Have you ever been driving along, everything feeling just fine, when suddenly that little orange “Check Engine” light flicks on? It’s one of those moments that instantly raises your stress level. But don’t panic—this doesn’t always mean a costly repair is on the horizon. In many cases, you can figure out the issue yourself without heading straight to a mechanic. That’s where these DIY steps for engine light diagnosis come in handy.
In this guide, we’ll walk you through a practical, easy-to-follow process to understand and potentially fix the issue behind that dreaded light. Whether you’re new to car maintenance or a seasoned DIYer, you’ll find this breakdown both helpful and empowering.
Step 1: Understand What the Engine Light Is Telling You
First things first—what exactly does the check engine light mean? Well, your car is smart. It’s equipped with an onboard diagnostics system, or OBD-II, which monitors everything from your engine’s performance to your emissions system. When something goes wrong, it sends out a signal in the form of the engine light.
There are two types of alerts:
- Steady Light: This usually means there’s a minor issue. Maybe a sensor is acting up, or your gas cap isn’t on tight enough.
- Flashing Light: This is your car yelling, “Help me now!” It often indicates a severe issue like an engine misfire, which could lead to serious damage if not addressed quickly.
Either way, your goal with these DIY steps for engine light diagnosis is to figure out what’s going on without panic or unnecessary cost.
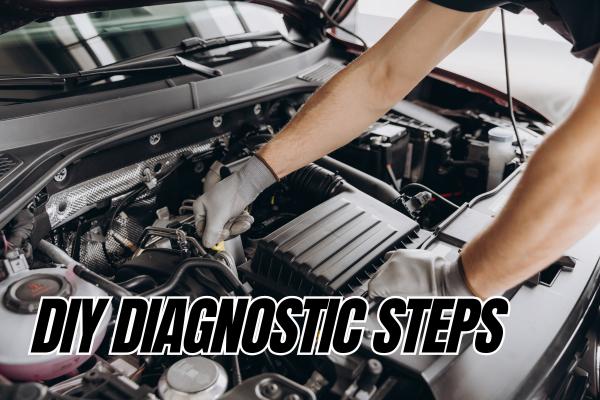
Step 2: Start With a Simple Visual Check
You’d be surprised how often the fix is something super simple. So, before diving into tools and codes, do a quick walkaround and pop the hood.
Here’s what to look for:
- Gas Cap: Yep, this tiny part is one of the most common reasons the light comes on. Make sure it’s on tight and in good shape.
- Fluid Levels: Check your engine oil, coolant, and transmission fluid. Low levels can trigger warning lights.
- Battery Terminals: Corrosion or loose cables can mess with your car’s electrical system.
- Visible Damage: Look for cracked hoses, worn-out belts, or anything that just doesn’t look right.
This quick inspection could save you time and money. Plus, it’s always smart to get familiar with what’s under your hood.
Step 3: Use an OBD-II Scanner (It’s Easier Than You Think)
Now for the fun part: plugging into your car’s brain. An OBD-II scanner might sound high-tech, but it’s very user-friendly. Many auto parts stores will even let you borrow one for free.
Here’s how to use it:
- Locate the OBD-II port (usually under the dashboard on the driver’s side).
- Plug in the scanner and turn your key to the “on” position (but don’t start the engine).
- Read the codes. The scanner will give you a code like P0300 or P0457.
- Look up what the code means. Most scanners will give you a short description, or you can Google it.
For example:
- P0171: Engine running too lean (could be a vacuum leak or dirty MAF sensor).
- P0420: Catalytic converter efficiency below threshold (sometimes a faulty oxygen sensor).
This is the heart of DIY steps for engine light diagnosis —getting the code and understanding what it means. It puts you in control.
Step 4: Research the Fix
Once you’ve got your code, the next step is to dig into what it means for your specific vehicle. Not all cars respond the same way to the same problem, so context matters.
Here are some tools to help:
- Your car’s service manual (often available online)
- YouTube tutorials —look for ones that match your car’s make and model
- Automotive forums like r/Cartalk or your car’s specific enthusiast groups
- OBD code websites like obd-codes.com
Let’s say you get a code for a faulty oxygen sensor. With a few tools and an online guide, you might be able to replace it yourself in under an hour, and for a fraction of what a shop would charge.
Step 5: Clear the Light (The Right Way)
Once you’ve fixed the issue, it’s time to clear the check engine light. Most scanners have a “clear codes” or “erase codes” function. Use it to reset the system and see if the light comes back on.
Alternatively, you can disconnect your car’s battery for about 15 minutes, then reconnect it. This will usually clear the light, though it may also reset other settings like your clock or radio presets.
Pro tip: If the light comes back after clearing, the problem hasn’t been fully fixed, or there’s another issue that also needs attention.
Step 6: Keep an Eye on Things
After you’ve gone through the DIY steps for engine light diagnosis, you’ll want to monitor your car’s performance for a few days.
Pay attention to:
- Unusual noises
- Sluggish acceleration
- Poor fuel economy
- Rough idling
If anything feels off, it might be time to dig a little deeper—or consult a professional. But chances are, if you’ve taken the right steps, you’ve handled the issue.
Frequently Asked Questions
1. How serious is a check engine light?
It depends. A steady light might just be a minor issue, but a flashing light is urgent and usually points to a serious engine problem.
2. Can I ignore the check engine light if my car runs fine?
You shouldn’t. Even if the car feels okay, ignoring it could lead to bigger issues down the road or hurt your fuel efficiency.
3. What’s the most common reason the light comes on?
A loose or cracked gas cap is incredibly common and easily fixed.
4. Is it safe to use a cheap OBD-II scanner?
Absolutely. Basic models can read and clear codes just fine. You don’t need a $300 tool to get started.
5. Will my car pass inspection with the check engine light on?
Nope. In most states, your car won’t pass emissions or state inspection if the light is on.
Conclusion
A check engine light doesn’t have to mean an expensive trip to the shop. With these DIY steps for engine light diagnosis, you can often identify and fix the issue yourself. From a simple gas cap check to using an OBD-II scanner, these steps can save you money and give you confidence in understanding your vehicle.
Next time that light pops on, take a deep breath—you’ve got this.